Widgetを試してみた - タップするとアプリが立ち上がるだけ
実装したモノ
エミュレータ画像

ソースコード
やったこと
WidgetSampleWidgetProvider.kt (「AppWidgetProvider クラスの実装」に該当)
前回の記事で、空クラスだったもの。
class WidgetSampleWidgetProvider : AppWidgetProvider() {

    private val text = "Hello Widget World!"
    override fun onUpdate(
        context: Context?,
        appWidgetManager: AppWidgetManager?,
        appWidgetIds: IntArray?
    ) {
        val pendingIntent: PendingIntent = Intent(context, MainActivity::class.java)
            .let { intent ->
                PendingIntent.getActivity(context, 0, intent, 0)
            }

        appWidgetIds?.forEach {id ->
            val views: RemoteViews = RemoteViews(
                context?.packageName,
                R.layout.widget_sample_widget
            ).apply {
                setOnClickPendingIntent(R.id.textView, pendingIntent)
            }

            appWidgetManager?.updateAppWidget(id, views)
        }
    }
}
変数pendingIntent
アプリを立ち上げるためのintent。
appWidgetIds
ウィジェットのID。
同じアプリで複数のウィジェットを生成する事が出来るため、その複数のウィジェットを識別するためのID。
ここでは、forEachを使ってID毎に処理している。
views: RemoveViews
ウィジェットのレイアウトを操作するための変数。
RemoteViews自体は、公式によると以下のようなモノ。
別のプロセスで表示できるビュー階層を記述するクラス。階層はレイアウト リソース ファイルから拡張されます。このクラスは、拡張された階層のコンテンツを変更するための基本的な操作を提供します。
RemoteViews次のレイアウトのサポートに制限されています。
AdapterViewFlipperFrameLayoutGridLayoutGridViewLinearLayoutListViewRelativeLayoutStackViewViewFlipperそして、次のウィジェット:
コレを使って、TextViewがタップされた場合に先程のpendingIntenを使ってアプリを起動するよう指定。
appWidgetManager?.updateAppWidget(id, views)
最後に、updateAppWidgetをコールしてウィジェットを更新する。
参考サイト
Widgetを試してみた - 単純にテキストを表示させるだけ
実装したモノ
エミュレータ画像
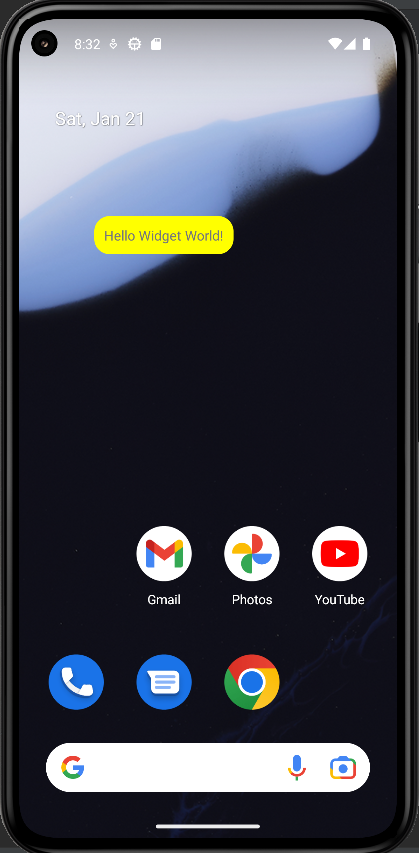
「Hello Widget World!」というTextViewを、Widgetとして表示させただけ。
ソースコード
Widget実装の基本情報
- AppWidgetProviderInfo オブジェクト
- AppWidgetProvider クラスの実装
- ビューのレイアウト
やったこと
事前準備
New Project -> Empty Activity
でプロジェクトを作成。
AndroidManifest.xml
<application ...>
    ...
    <receiver android:name="WidgetSampleWidgetProvider"
        android:exported="false">
        <intent-filter>
            <action android:name="android.appwidget.action.APPWIDGET_UPDATE" />
        </intent-filter>
        <meta-data android:name="android.appwidget.provider"
            android:resource="@xml/widget_sample_widget_info" />
    </receiver>
</application>
receiverタグ
intent-filterタグ & actionタグ
- android:name
- 使用するintentを指定する
- 今回は使わなかったけれど、後々使う予定なので記述だけした
meta-dataタグ
WidgetSampleWidgetProvider.kt (「AppWidgetProvider クラスの実装」に該当)
今回は使わないので、とりあえず定義しただけ。
class WidgetSampleWidgetProvider : AppWidgetProvider() {
}
本来は、ここでウィジェットがイベント(ブロードキャスト)を受け取った際の動作を定義する。
widget_sample_widget_info.xml (「AppWidgetProviderInfo オブジェクト」に該当)
<?xml version="1.0" encoding="utf-8"?>
<appwidget-provider xmlns:android="http://schemas.android.com/apk/res/android"
    android:minWidth="80dp"
    android:minHeight="40dp"
    android:updatePeriodMillis="86400000"
    android:initialLayout="@layout/widget_sample_widget"
    android:resizeMode="horizontal|vertical"
    android:widgetCategory="home_screen">
</appwidget-provider>
appwidget=providerタグ
- android:minWidth
- 最小幅
- 初期表示時は、この幅になる
- android:minHeight
- 最小高さ
- 初期表示時は、この高さになる
- android:updatePeriodMillis
- android:initialLayout
- ビューのレイアウトの場所を指定する
- android:resizeMode
- どの方向に対してリサイズできるか?を指定する
- horizontalで水平方向、verticalで垂直方向
- android:widgetCategory
widget_sample_widget.xml (「ビューのレイアウト」に該当)
<?xml version="1.0" encoding="utf-8"?>
<RelativeLayout xmlns:android="http://schemas.android.com/apk/res/android"
    android:layout_width="wrap_content"
    android:layout_height="wrap_content"
    android:padding="10dp"
    android:background="#FFFF00">

    <TextView
        android:id="@+id/textView"
        android:layout_width="wrap_content"
        android:layout_height="wrap_content"
        android:text="Hello Widget World!" />
</RelativeLayout>
ここは適当。
但し、使用可能な
- レイアウトクラス
- ウィジェットクラス
が限られているので、注意が必要。(詳しくは公式サイトを参照)
参考サイト
Kotlin 1.8.0 released at 2022/12/28
Kotlin公式のリリースページ
https://kotlinlang.org/docs/whatsnew18.html
更新の大きな変更点
- New experimental functions for JVM: recursively copy or delete directory content
(JVM の新しい実験的機能: ディレクトリの内容を再帰的にコピーまたは削除) - Improved kotlin-reflect performance
(kotlin-reflect パフォーマンスの改善) - New -Xdebug compiler option for better debugging experience
(デバッグ エクスペリエンスを向上させる新しい -Xdebug コンパイラ オプション) - kotlin-stdlib-jdk7 and kotlin-stdlib-jdk8 merged into kotlin-stdlib
(kotlin-stdlib-jdk7 と kotlin-stdlib-jdk8 を kotlin-stdlib に統合) - Improved Objective-C/Swift interoperability
(Objective-C/Swift の相互運用性の向上) - Compatibility with Gradle 7.3
(Gradle 7.3 との互換性)
詳細
1. New experimental functions for JVM: recursively copy or delete directory content
(JVM の新しい実験的機能: ディレクトリの内容を再帰的にコピーまたは削除)
この機能は実験的なため、使用したい場合はオプトインが必要。
@OptIn(kotlin.io.path.ExperimentalPathApi::class)
もしくは、
@kotlin.io.path.ExperimentalPathApi
もしくは、コンパイルオプションに、
-opt-in=kotlin.io.path.ExperimentalPathApi
を記述する。
再帰的にコピーする関数
copyToRecursively()
ディレクトリとその内容を別の宛先にコピーします。
再帰的に削除する関数
deleteRecursively()
ディレクトリとその内容を削除します。
2. Improved kotlin-reflect performance
(kotlin-reflect パフォーマンスの改善)
kotlin-reflectとは
Javaなど、各言語で備えるリフレクション機能のKotlin版。
クラス構造(プロパティなど)を読み取ったり書き換えたりする機能。KClass(クラス参照)、KProperty(プロパティ参照)を利用する。
改善内容
内部キャッシュ機構をJavaのClassValueに移行した事により、キャッシュ対象が増えた。
1.8より前
- KClass (クラス定義そのものの情報)
1.8
- KClass (クラス定義そのものの情報。)
- KType (変数の型情報)
- KDeclarationContainer (調べたが、よく分からず...)
これにより、指定した型のインスタンスを取得するtypeOf()をコール時のパフォーマンスが向上した。
3. New -Xdebug compiler option for better debugging experience
(デバッグ エクスペリエンスを向上させる新しい -Xdebug コンパイラ オプション)
最適化を無効にして、デバッグしやすくするオプション、らしい。
現時点では、コルーチンの最適化を外せる。
将来的には、他の最適化も無効にできるようにする、との事。
具体的な恩恵
最適化機能がONの場合、サスペンド関数中の変数を最適化する。
そのため、変数の値を見る事ができない。
これが、-Xdeugオプションによって、見る事ができるようになる。
4. kotlin-stdlib-jdk7 and kotlin-stdlib-jdk8 merged into kotlin-stdlib
(kotlin-stdlib-jdk7 と kotlin-stdlib-jdk8 を kotlin-stdlib に統合)
省略。
5. Improved Objective-C/Swift interoperability
(Objective-C/Swift の相互運用性の向上)
省略。
6. Compatibility with Gradle 7.3
(Gradle 7.3 との互換性)
省略。
横スワイプでページ遷移できるタブの実装
実装したモノ
動画
ソースコード
実装方法
使用したライブラリ
- ViewPager2
-> 横スワイプでページ遷移できるようにするライブラリ - TabLayout
-> タブを表示するライブラリ
XML
res/layout/fragment_main.xml
<?xml version="1.0" encoding="utf-8"?>
<androidx.constraintlayout.widget.ConstraintLayout xmlns:android="http://schemas.android.com/apk/res/android"
    xmlns:app="http://schemas.android.com/apk/res-auto"
    xmlns:tools="http://schemas.android.com/tools"
    android:layout_width="match_parent"
    android:layout_height="match_parent">

    <com.google.android.material.tabs.TabLayout
        android:id="@+id/tab_layout"
        android:layout_width="match_parent"
        android:layout_height="wrap_content"
        app:layout_constraintEnd_toEndOf="parent"
        app:layout_constraintStart_toStartOf="parent"
        app:layout_constraintTop_toTopOf="parent" />

    <androidx.viewpager2.widget.ViewPager2
        android:id="@+id/pager"
        android:layout_width="match_parent"
        android:layout_height="0dp"
        app:layout_constraintBottom_toBottomOf="parent"
        app:layout_constraintEnd_toEndOf="parent"
        app:layout_constraintStart_toStartOf="parent"
        app:layout_constraintTop_toBottomOf="@+id/tab_layout" />
</androidx.constraintlayout.widget.ConstraintLayout>
TabLayoutとViewPager2を、記述する。
ソースファイル
TabCollectionAdapter.kt
class TabCollectionAdapter(fragment: Fragment) : FragmentStateAdapter(fragment) {

    override fun getItemCount(): Int = 4

    override fun createFragment(position: Int): Fragment {
        return when (position) {
            0 -> TabContent1Fragment()
            1 -> TabContent2Fragment()
            2 -> TabContent3Fragment()
            3 -> TabContent4Fragment()
            else -> TabContent1Fragment()
        }
    }
}
FragmentStateAdapterを継承したクラスを定義する。
以下の2関数をオーバーライドする。
- getItemCount
-> タブの数を返す関数 - createFragment
-> タブの位置(引数のposition)によって、表示したいフラグメントを返す関数
MainFragment.kt
class MainFragment : Fragment() {

    private lateinit var tabCollectionAdapter: TabCollectionAdapter
    private lateinit var viewPager: ViewPager2

    override fun onCreateView(
        inflater: LayoutInflater,
        container: ViewGroup?,
        savedInstanceState: Bundle?
    ): View? {
        return inflater.inflate(R.layout.fragment_main, container, false)
    }

    override fun onViewCreated(view: View, savedInstanceState: Bundle?) {
        tabCollectionAdapter = TabCollectionAdapter(this)
        viewPager = view.findViewById(R.id.pager)
        viewPager.adapter = tabCollectionAdapter

        val tabLayout: TabLayout = view.findViewById(R.id.tab_layout)
        tabLayout.tabMode = TabLayout.MODE_SCROLLABLE
        TabLayoutMediator(tabLayout, viewPager) { tab, position ->
            tab.text = "TAB CONTENT ${(position + 1)}"
        }.attach()
    }
}
横スワイプでページ遷移できるようにする部分
tabCollectionAdapter = TabCollectionAdapter(this)
viewPager = view.findViewById(R.id.pager)
viewPager.adapter = tabCollectionAdapter
TabCollectionAdapterを生成し、viewPagerのAdapterにセット。
タブを表示する部分
val tabLayout: TabLayout = view.findViewById(R.id.tab_layout)
tabLayout.tabMode = TabLayout.MODE_SCROLLABLE
TabLayoutMediator(tabLayout, viewPager) { tab, position ->
    tab.text = "TAB CONTENT ${(position + 1)}"
}.attach()
TabLayoutMediatorによって、タブとスワイプ可能なページを紐づける。
また、tabModeにMODE_SCROLLABLEをセットする事によって、タブ部分をスワイプ可能にする。